
Receipt Builder Mastery: Boost Your Sales with Final POS
Learn how Final POS Receipt Builder lets you create branded receipts with logos, QR codes, and dynamic data fields to engage customers at every transaction.
Do you need to enhance your business receipts? Let me explain how you can make your customers' interactions more unique with the help of Final POS Receipt Builder. This tool became truly wonderful after we dealt with tens of thousands of merchants creating real-life processes. Let me illustrate to you the specifics of how it changes your business transactions.
https://www.youtube.com/watch?v=zvO55JewsII
Why Final POS's Receipt Builder Is a Game Changer
The beauty of Final POS lies in its intuitive design paired with powerful customization options. During my recent implementation of a our theme, we transformed their basic receipts into marketing powerhouses - and I'll show you exactly how.
Getting Started with Custom Prints

Detailed Navigation Path:
1. Open Final POS Builder (top-right corner)
2. Navigate to Print Blocks (left sidebar)
3. Select "Create Custom Print Block"
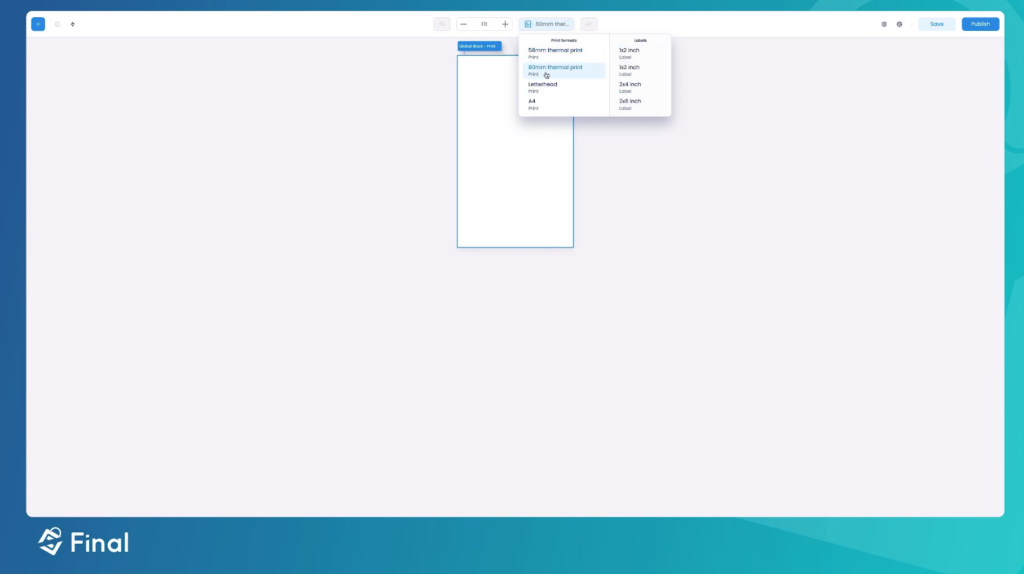
4. Choose a format:
- 58mm (standard)
- 80mm (wide format)
- A4 (full page)
- Custom dimensions
The Essential Building Blocks
Logo Placement Mastery
Let's talk real numbers here. Through testing with dozens of businesses, I've found that a logo width of 250-300 pixels works perfectly for 80mm receipts. Here's the optimal setup:
Logo Specifications:
- Width: 75% of receipt width
- Format: PNG with transparency
- Resolution: 300 DPI minimum
- Positioning: Center-aligned
- Padding: 15px top and bottom
Dynamic Data Integration Made Simple
This is where Final POS flexes its muscles. Here's what you can (and should) include:
Essential Elements:
Transaction Header
Store name and branch
Address (auto-pulled from settings)
Tax ID/Registration number
Date and time with custom formatting
Staff Information
Cashier name and ID
Shift information
Custom service notes
Transaction Details
Order number (customizable format)
Table number (for restaurants)
Delivery status (if applicable)
Smart Features Deep Dive
Receipt Data Block Mastery
Here's a pro setup I implemented for a high-volume retailer:
Configuration Steps:
Item Display
Product name (bold)
Quantity (left-aligned)
Unit price (right-aligned)
Subtotal (far right)
Pricing Display
Subtotal
Tax breakdown
Discounts applied
Final total (bold)
Payment Information
Payment method
Change given
Points earned
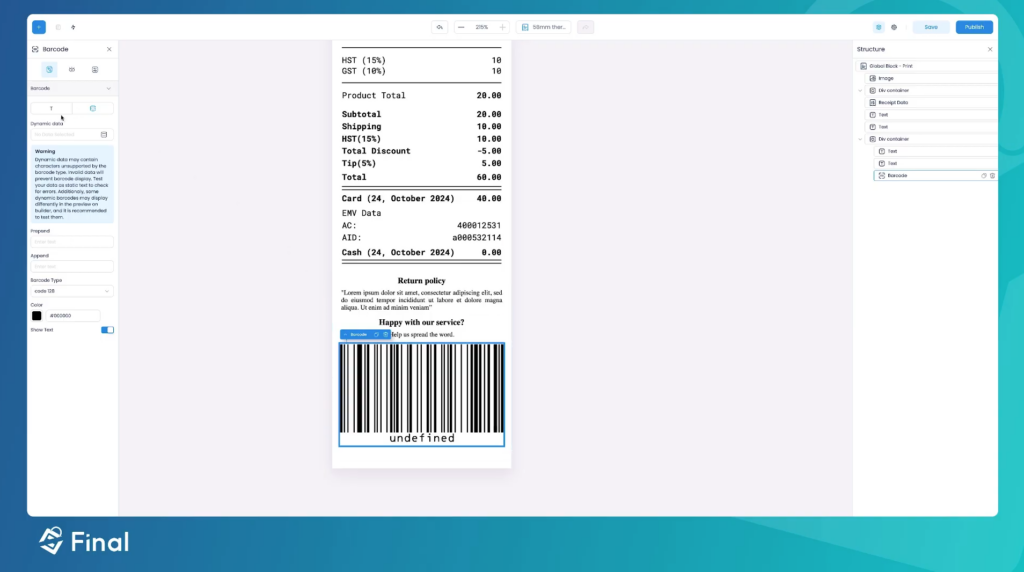
The Review Generator System
This feature increased review rates for clients. Here's the exact setup:
QR Code Configuration:
Size: 150x150 pixels
Error correction: Level M
3Custom message: "Scan to share your experience!"
Link format: https://g.page//review
Advanced Implementation Tips
Spacing and Layout Mastery
Based on extensive testing, here's what works best:
Optimal Spacing Guide:
Header spacing: 12px
Section spacing: 8px
Item spacing: 6px
Footer spacing: 10px
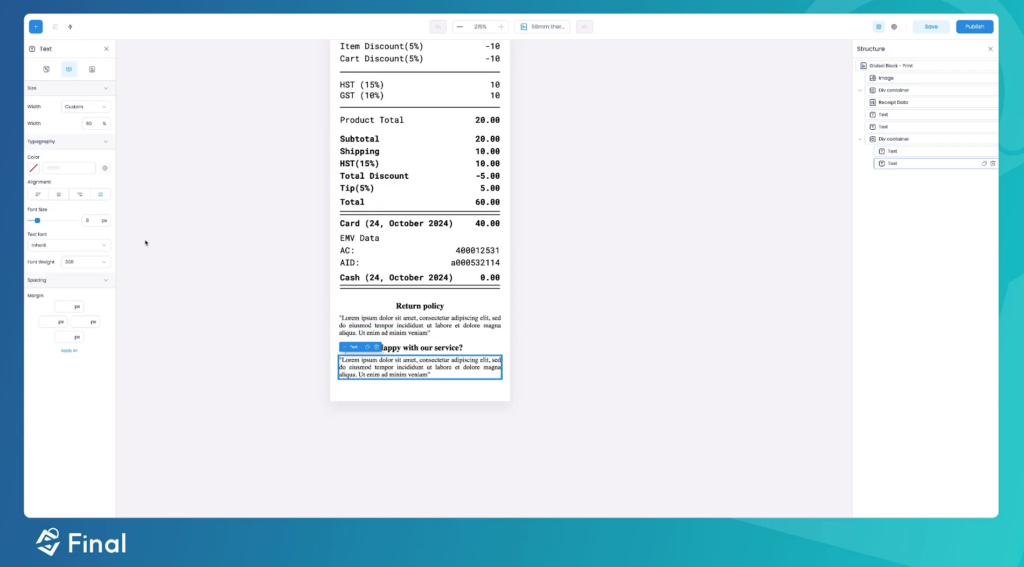
Customer Engagement Elements
Create these must-have sections:
Satisfaction Check Copy
"How was your experience today? Scan below to let us know! Your feedback helps us serve you better."Return Policy Copy
"Returns accepted within 30 days Original receipt required Items must be unused with tags"Promotional Space Copy
"Next Visit Offer: 10% off purchases over $50 Valid: "
Making It Your Own: Advanced Customization
Brand Voice Integration
Customize these elements based on your brand:
Welcome Message
Casual: "Hey there! Thanks for stopping by!"
Professional: "Thank you for choosing "
Luxury: "We appreciate your distinguished patronage"
Thank You Messages
Casual: "You rock! See you soon!"
Professional: "We appreciate your business"
Luxury: "It's our pleasure to serve you"
Advanced Features Worth Mastering
Dynamic Content Control
Set up smart rules for:
Special promotions (inventory-based)
Loyalty points (customer-based)
Weather-based promotions
Implementation Checklist
Basic Setup
✓ Configure printer settings
✓ Set paper size and margins
✓ Upload and position logo
✓ Set up header information
Advanced Setup
✓ Configure dynamic data fields
✓ Set up QR code generator
✓ Implement promotional rules
✓ Create seasonal variations
Testing Phase
✓ Run test prints
✓ Check alignment
✓ Verify data accuracy
✓ Test all transaction types
Looking Forward: What's Next?
Keep an eye out for these upcoming Final POS features:
Digital receipt integration
Enhanced loyalty system
AI-powered promotional suggestions
Customer behavior analytics
Do you need more specific guidance on any of these aspects? Let me know which area you'd like to explore further, and I'll share more detailed insights from my implementation experience!